
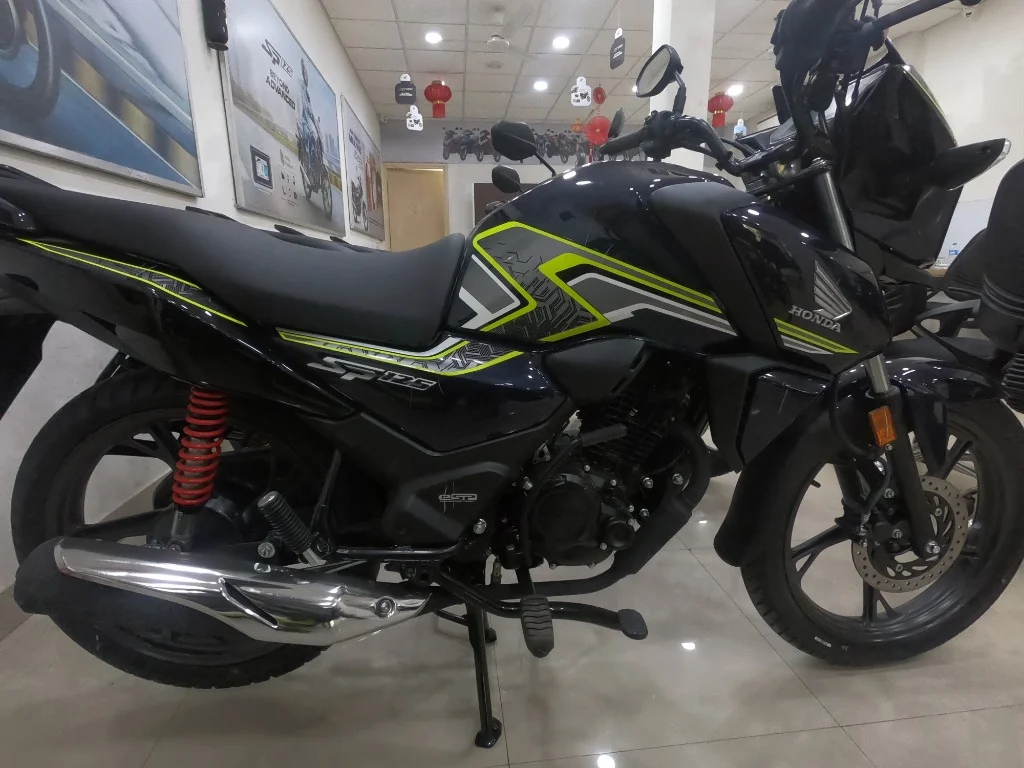
Honda SP 125 Common Problems & Solutions: Symptoms, Causes & Mechanic Fixes
A research-based troubleshooting guide for the Honda SP 125 BS6 covering gear shifting stiffness, drive chain rattling, engine jerking (jhatka), mileage drops, and rear suspension stiffness.
Reviewed by verified mechanic · senior
Symptoms
Stiff or clunky gear shifts, difficulty finding Neutral, and notchiness when downshifting from 3rd to 2nd gear in heavy traffic.
Rattling, metallic slapping, or 'kit-kit' noise from the drive chain and front sprocket area over uneven roads.
Engine hesitation, sudden jerking ('jhatka'), or power missing under light throttle between 30 km/h and 45 km/h.
Sudden drop in fuel economy from expected 55–65 kmpl down to 40–48 kmpl without changes in riding route.
Harsh jolts transmitted through the seat to the lower back when riding over sharp potholes and expansion joints.
Sluggish cranking or ACG silent starter failure after leaving the bike parked for several days.
Possible causes
01
Clutch cable free play and degraded engine oil viscosity
Insufficient or excessive clutch lever free play (outside Honda's 10–20 mm specification) prevents full clutch disengagement. Additionally, thermal shearing of engine oil after 3,000+ km in Indian urban heat causes wet-clutch plate drag and notchier gear lever action.
02
Drive chain slack out of spec and grit accumulation
The semi-enclosed chain collects road dust, mud, and rain spray, which washes away factory grease. Once the chain stretches beyond the allowable 25–35 mm slack limit, it slaps against the swingarm rubber slider and generates repetitive noise.
03
Throttle body and fuel injector carbon deposits from E20 fuel
With ethanol-blended petrol (E20) widespread across India, moisture absorption and fine carbon gumming can develop on the injector nozzle and throttle plate butterfly, disturbing delicate low-RPM fuel atomization.
04
Combi-Brake System (CBS) equalizer drag and clogged paper air filter
An overtightened rear brake linkage or misadjusted CBS equalizer cable causes the front or rear brake pads to drag imperceptibly against the drum/disc. In addition, the oil-coated viscous paper air filter clogs quickly in dusty city environments, enriching the air-fuel mixture.
05
Rear suspension preload set too stiff for solo rider weight
From the factory or dealership, the twin hydraulic rear shock absorbers are often left on middle or higher preload notches (Step 3 or Step 4), which is engineered for two heavy occupants rather than a solo commuter under 75 kg.
06
Frequent ultra-short commutes causing battery state-of-charge deficit
Frequent trips under 2 km with full LED lighting draw continuous battery reserve, while the ACG starter-generator does not receive sufficient engine run-time to replenish the 12V 4Ah maintenance-free battery.
What you can check
01
Measure clutch lever free play at the lever pivot
Check the free movement at the tip of the clutch lever before resistance is felt. Ensure it measures strictly between 10 mm and 20 mm. Check that the clutch arm at the engine crankcase moves smoothly without sticking.
02
Measure drive chain slack on the side stand
With the motorcycle on its side stand in Neutral, push the lower chain run up and down midway between the front and rear sprockets. Vertical slack must be between 25 mm and 35 mm. Inspect for stiff, binding links or rusted rollers.
03
Check tyre pressures and spin wheels on main stand (Brake Drag)
Verify cold tyre pressures (25 PSI front, 29 PSI rear solo / 36 PSI pillion). Put the bike on the center stand, raise each wheel, and spin it by hand. Both front and rear wheels must spin freely for multiple rotations with zero binding friction from the CBS linkage.
04
Inspect the 5-step rear suspension preload notch
Look at the stepped collar at the base of both rear shock absorbers. Note which notch the peg is seated in (Notch 1 is softest, Notch 5 is firmest). Ensure both left and right shocks are adjusted to the exact same notch.
05
Measure resting and charging battery voltage
Using a multimeter, test DC voltage across the battery terminals with ignition off (must be 12.4 V or higher). Start the engine and rev to ~3,000 RPM; charging voltage should rise to 14.0 V–14.8 V.
06
Inspect spark plug electrode gap and color
Remove the spark plug cap and unscrew the plug with the 16 mm plug spanner. Inspect the electrode tip: a healthy plug is light brown/tan; heavy black sooting indicates rich running or incomplete combustion. Check the gap is 0.8–0.9 mm using a wire feeler gauge.
07
Diagnostic OBD scan and throttle body inspection
Connect a diagnostic scan tool to the red Honda OBD-2 port under the side panel. Check for stored Diagnostic Trouble Codes (DTCs) related to the Manifold Absolute Pressure (MAP) sensor, Engine Oil Temperature (EOT) sensor, or O2 sensor.
Solutions
01
Calibrate clutch cable free play and use genuine 10W-30 JASO MA oil
Loosen the lock nut on the clutch cable adjuster at the handlebar lever or engine crankcase bracket and adjust free play to exactly 15 mm. Drain and refill with Honda 4T Genuine 10W-30 JASO MA engine oil (0.9 L capacity) every 3,500–4,000 km to restore buttery-smooth shift engagement.
02
Clean, tension, and lubricate drive chain every 500 km
Clean the drive chain using a dedicated chain brush and non-solvent chain cleaner. Lubricate with EP-grade spray lubricant on the inner roller surface. Loosen the rear axle nut (19 mm) and turn the chain adjuster bolts evenly to set slack to 30 mm. Replace the chain-sprocket kit if teeth are hooked or worn unevenly (typically around 18,000–22,000 km).
03
Throttle body flush and injector cleaner treatment
Have an authorized mechanic remove the air intake duct and clean the throttle bore and butterfly valve with aerosol throttle body cleaner. For stubborn hesitation, run a fuel injector cleaner additive through a full tank of high-grade petrol or have the injector cleaned ultrasonically.
04
Replace viscous paper air filter and adjust CBS equalizer cable
Never use compressed air or wash the Honda SP 125 viscous paper filter, as it destroys the oil-impregnated fibrous barrier; replace it every 12,000–15,000 km. Adjust the rear brake adjusting nut and CBS equalizer screw so that the rear brake pedal has 20–30 mm free play without dragging.
05
Adjust rear shock absorbers to Step 1 or Step 2
Using the C-spanner hook provided in the under-seat tool pouch, engage the stepped collar of each rear shock absorber and turn counter-clockwise to Notch 1 (softest) or Notch 2. This immediately softens the initial compression stroke, eliminating harsh lower back shocks on broken urban roads.
06
Recharge or condition battery with regular riding
If the ACG silent starter hesitates, bench-charge the battery with an automatic 12V motorcycle charger. Ensure at least one continuous 20–30 minute ride weekly to allow the alternator to maintain full battery capacity.

When a check needs a workshop
Some electrical and engine checks need the right tools and training. Ask a qualified mechanic to confirm the cause before replacing parts.
Honda SP 125 Long-Term Review: 10,000 km Real-World Ownership Report & Verdict
Tested Mileage: 61.4 km/l • 1-Year Maintenance: ₹2,850 - ₹3,350
Sources and review
Honda Motorcycle & Scooter India: SP 125 Official Specifications & Portal · checked 2026-11-15
ARAI India: Automotive Industry Standards & BS6 OBD-2 Compliance · checked 2026-11-15
BikersDunia Editorial & Mechanical Research: Honda SP 125 Field Diagnosis · checked 2026-11-15
Supporting workshop photo: by Amuzujoe / Wikimedia Commons · CC BY-SA 4.0 · converted to WebP without other image edits.
Technical review: verified mechanic · senior · updated 2026-11-14
What did you notice?
Share what happened on this bike. Replies stay private until a moderator reviews them. Please leave out phone numbers, email addresses, and other private details.
No approved replies yet
Be the first to share a useful observation. Your note appears here only after review.
Details that help other riders
Model year and variant
When it happens: cold, warm, idle, or while moving
What you have already looked at